My first show at 96kHz on a DM7
Posted on February 12, 2025
The last week of January of 2025, Hermosillo Video Engineering, out of Mesa, AZ brought me on to design, deploy, and mix a show for their client at the Hotel Cleveland, in Cleveland OH. The event was held in their historic (but recently remodeled) grand ballroom for a sales kickoff with roughly 750 in attendance. Featuring keynotes, fireside chats, panels, and a lively awards celebration.
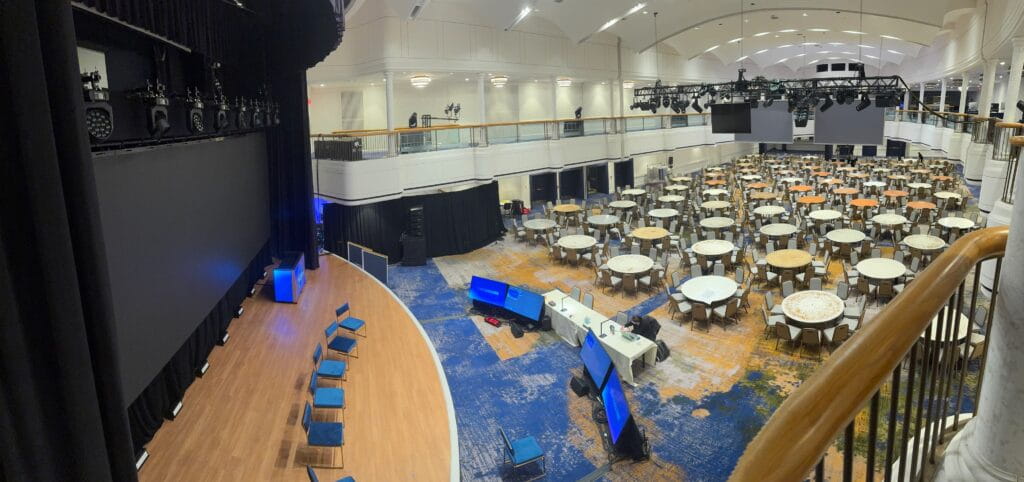
Prior to the opening night gala dinner. (Seating changed to classroom after this).
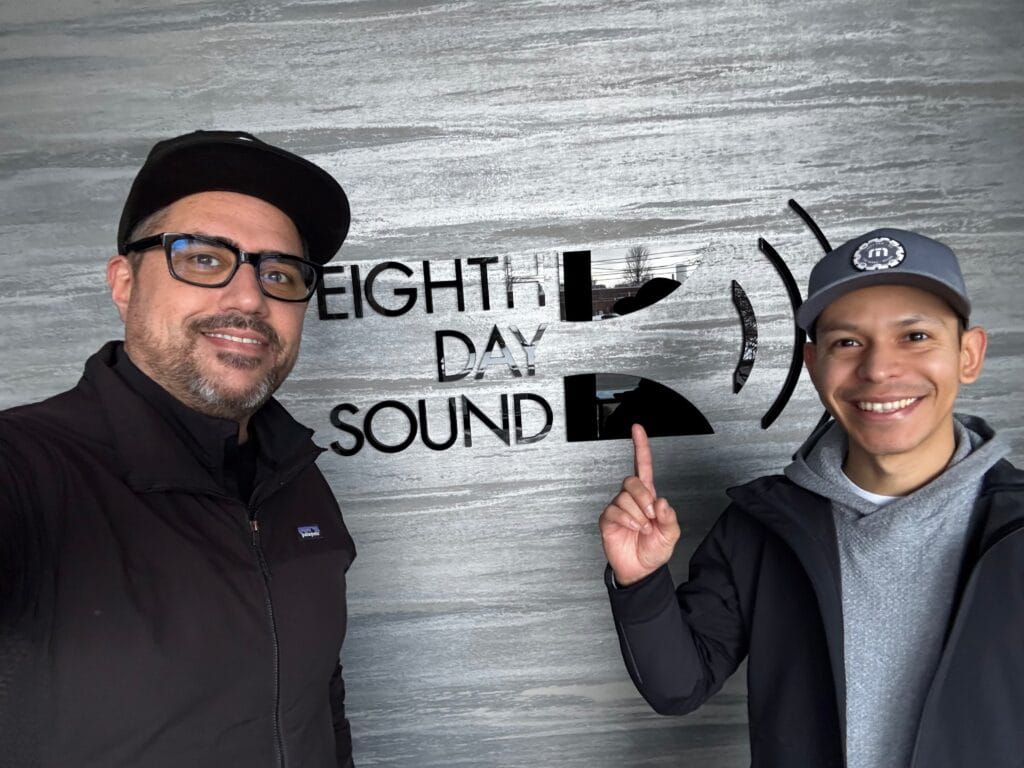
Brian Frost (left) with Hugo Navejar – A2 + Comms (right).
Eighth Day Sound, now apart of the Clair Global family, was chosen as the audio vendor.
We were given a tour of their Cleveland location prior to prep. So much history in this building! The halls lined with framed photos and posters of A-level tours of yore! Shoutout to Victor Arko, Cory Ocadciw, and Neal Dingies from Eighth Day for taking good care of us.
For this event I chose a D&B Audiotechnik XSL rig + KSL GSubs with Y10p’s & E8s for delays & fills.
I’m a huge D&B fan, especially their SL series. It just sounds great right out of the box without much effort. (But yes… I did put a filter or two in ;). The built-in cardioid makes it a joy to mix by greatly reducing on stage SPL.
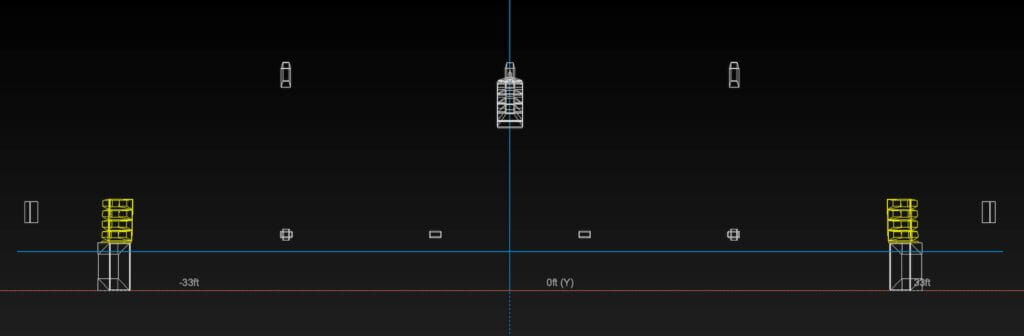
D&B Audiotechnik Array Calc prediction software ‘end’ view
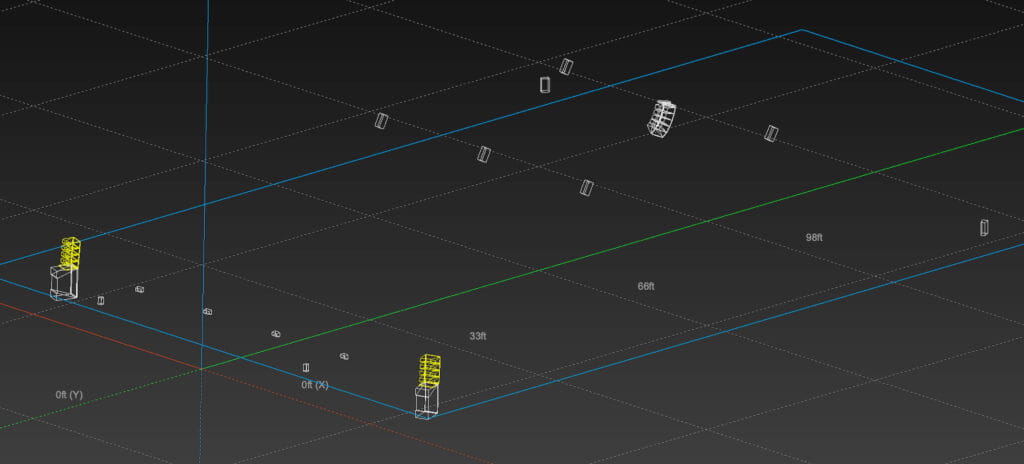
D&B Audiotechnik Array Calc prediction software ‘iso’ view
My console of choice for this one was the Yamaha DM7ex. I picked this for a few reasons, chiefly for being Dante native with seamless Shure integration, but also because I wanted to do this show at 96kHz. Why 96kHz? I say why not!? Most people can hear the difference in mp3 sound quality from 128kbps to 192kbps, and even to 320kbps on a good home system or headphones. More information, in most cases, means higher resolution. Does this analogy hold true when comparing 48kHz to 96kHz for pro audio? Well, yes and no. Consider your transducer (that’s fancy talk for a speaker system). On AirPods it’s going to be impossible to discern, but when you scale up to a professional sound system, It’s possible to hear the subtle differences in certain scenarios, especially if you were to A/B them.
96kHz has twice the sampling rate as 48kHz. What does this mean? Let’s go to school for a second (I’m going to learn right along with you here) – The sampling rate is the number of times per second that an analog audio signal is measured (sampled) to create a digital representation. So how does ‘sampling’ audio 96 times per second vs 48 times result in ‘better’ audio? Well, to understand the nuances, let’s talk about the ’Nyquist Theorem’. It states that half the sample rate represents the highest frequency that can be accurately recorded. At 44.1kHz, the Nyquist frequency is 22.05kHz. At 48kHz, 24kHz. And at 96kHz, 48kHz. The obvious question that is formed, is why do I need to have a sample rate higher than even 44.1kHz if the human ear can’t even hear up to 22.05kHz? One of these reasons is Aliasing. If frequencies above the Nyquist frequency are not filtered out before sampling, they “fold back” into the audible range, creating aliasing, which distorts the sound.
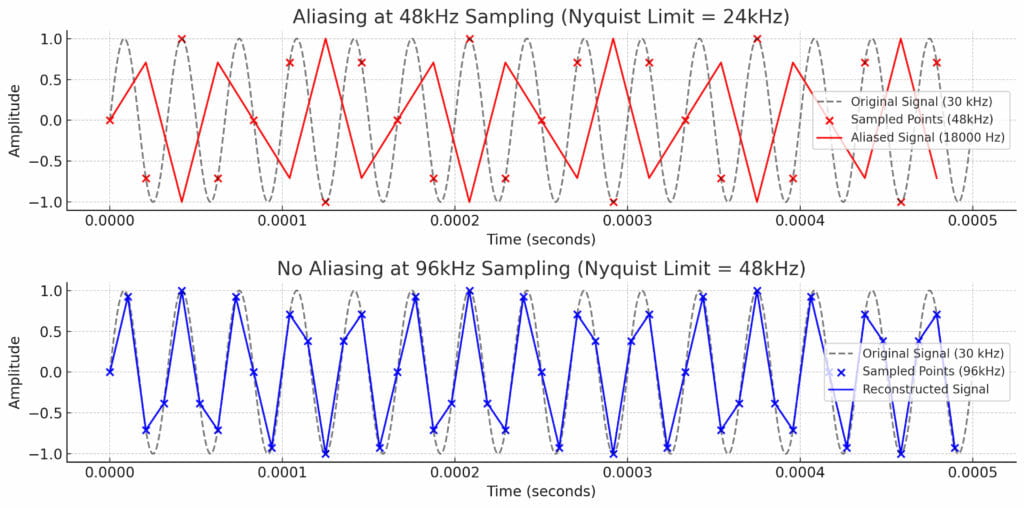
This visualization compares aliasing distortion at 48kHz vs 96kHz sampling
Top Plot (48kHz Sampling – Aliasing Present)
- The original signal is 30kHz, which is above the Nyquist frequency of 24kHz (48kHz / 2).
- The red sampled points create a false, lower-frequency waveform due to aliasing.
- The aliased signal appears at 18kHz (48kHz – 30kHz), producing unintended distortion.
Bottom Plot (96kHz Sampling – No Aliasing)
- The same 30kHz signal is sampled at 96kHz, where the Nyquist frequency is 48kHz.
- The blue sampled points accurately reconstruct the original signal without distortion.
- No aliasing occurs since 30kHz is below the Nyquist limit.
Here’s a real-world example. Imagine taking photos of a spinning wheel at a slow shutter speed. If the wheel spins too fast, it might appear as if it’s moving backward or at a different speed due to the way frames are captured. This is similar to how aliasing causes false frequencies to appear in digital audio.
I know, it’s a lot to digest. And if your head isn’t spinning yet and you’re still with me, you might be wondering – well hey, the microphones I’m using don’t even have a frequency response higher than 20kHz, so why do I care? A valid point. So it begs the question – where is aliasing most prevalent in audio?
- Synthesizers & Virtual Instruments: Digital oscillators can produce aliasing if not properly band-limited.
- Distortion & Saturation Plugins: These create harmonics, some of which can exceed the Nyquist frequency and cause aliasing.
- Pitch Shifting & Time Stretching: Can introduce artifacts if not processed carefully.
And also, to a degree :
- Digital Signal Processing: can cause aliasing, especially when using aggressive boosts, steep cuts, or nonlinear EQs at lower sample rates. The risk is higher in digital EQs that introduce harmonics or phase shifts in the process.
As a corporate FOH mixer that uses plug-ins every show, I’m mainly affected by the distortion of plugins, like noise-suppression, multi-band compressors, and mastering plugins. But also sometimes from the need to implement aggressive eq due to things like unavoidable bad speaker placement, a room with highly reflective surfaces, or accidental bad mic placement. But those of you who mix music more often could be affected by all three if you are using plug ins.
Hmm. Am I then saying that using popular live plug-in systems like Waves or VST Rack pro can cause aliasing? Even noise suppressors? Answer = Yes!
Noise suppression plugins can introduce aliasing, though it depends on how they process the signal. These plugins often use complex filtering, spectral subtraction, or machine learning algorithms, which can generate high-frequency artifacts that may exceed the Nyquist frequency and fold back as aliasing.
AI-based noise suppressors (like iZotope RX, Waves Clarity, or Cedar DNS) tend to have better anti-aliasing handling than older spectral-based noise reduction tools, but will producer better results at 96kHz vs. that of a lower sample rate. Higher sampling rates reduce latency in dsp.
Alright, So high frequency clarity, plug-in’s and aggressive eq. Got it. How Does 96kHz Sampling Affect the Low End of the Audio Spectrum?
its impact on the low end (bass frequencies, sub-bass) is minimal for most practical purposes. But do you tend to use filters on your low end? EQ? High pass? Compression? Plug-ins? 96kHz can result in ….
Lower Latency in Processing
- This can make low-frequency dynamics processing (EQ, compression, etc.) respond more naturally, especially in real-time applications.
Smoother Phase Response in Filters
- Many EQs and crossovers introduce phase shifts at low frequencies, which can color the bass.
- At 96kHz, digital filters work with less phase distortion, leading to a cleaner and more natural-sounding low end.
Potentially Better Transients in Bass Sounds
- Some bass sounds (e.g., kick drums, synth bass, bass guitars) contain high-frequency transient information.
- At 96kHz, these transients are captured more accurately, which may subtly improve punch and clarity.
Minimal Difference in Playback
- If you export your final mix at 44.1kHz or 48kHz, the low-end benefits of 96kHz may not be noticeable.
- The biggest improvements are heard during recording, mixing, and plugin processing.
Does 96kHz Make Bass “Tighter” or “Deeper”?
- Not directly—the depth and warmth of bass are more influenced by speaker response, room acoustics, and mixing choices.
- However, less phase distortion and better transient accuracy can result in a slightly cleaner and more defined low end.
Whew! Alright alright, I think that’s enough class time. This is a rabbit hole we could tumble down for a while. I would much prefer to be Alice and return to the surface than stay at the bottom and devolve into the Mad-Hatter, so let’s start climbing back out, shall we?
Designing in 96kHz.
I’m a visual person. If you know me, you have probably teased me about the number of screens I employ at my workstation. I can’t help it, my eyes are hungry for all the things RIGHT NOW. Anyway, I found a nifty site called Lucid that allows you to create line diagrams without much of a learning curve. Let me set this up first though.
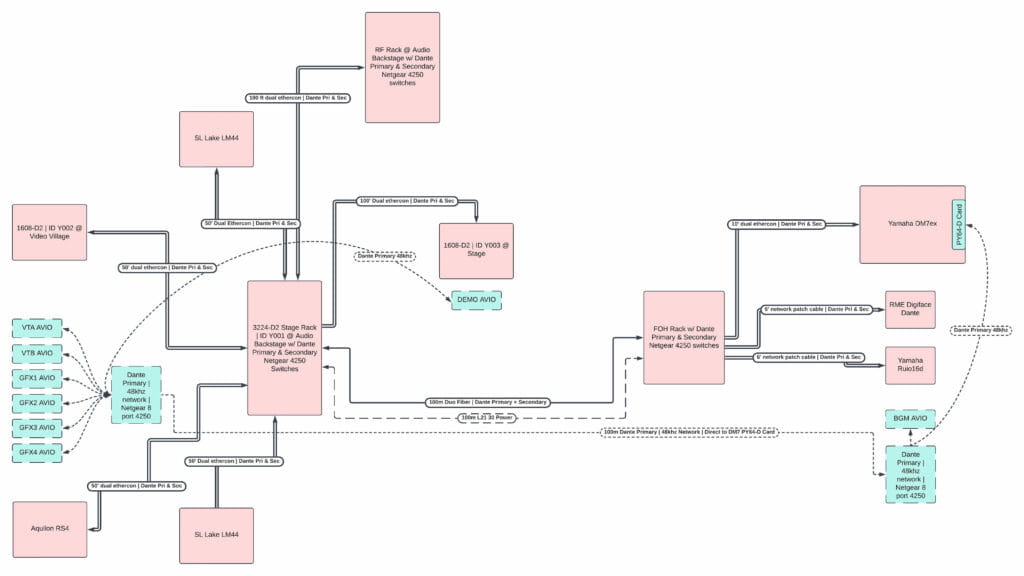
Cleveland Hotel Dante Network line diagram (red = 96kHz, blue = 48kHz)
My Dante assets:
96kHz
- Yamaha DM7ex
- RME Digiface Dante
- Yamaha Ruio16d
- Shure Axient Digital Mics
- D2 Rios (3224 & 1608s)
- Lake LM44s
- Aquilon RS4 (video playback)
48kHz
- AVIOs (yes, I could’ve gone analog here, and then into a Rio, but that’s gross. No thx.)
And the bridge between the two (set to 48kHz in this instance)
- Yamaha PY64-D card
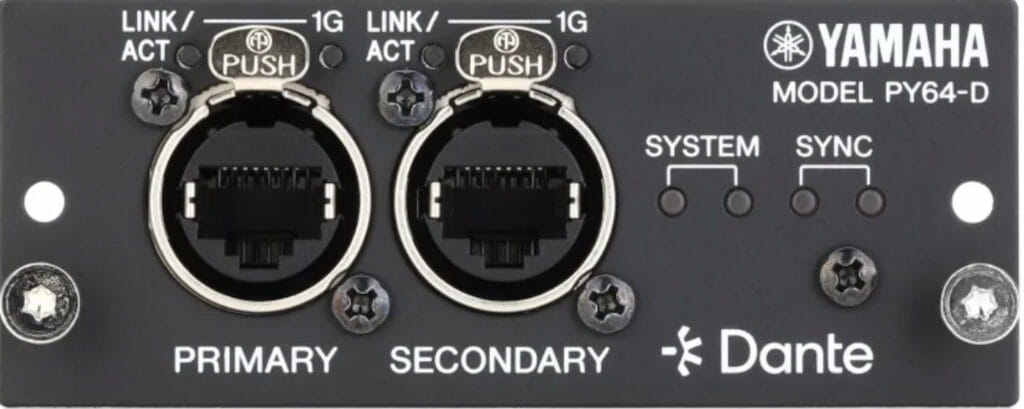
Yamaha PY64-D
This great little card does three things. First, it’s a 64×64 Dante card. Second, it’s a sample rate converter. Third, it bridges two different Dante networks (this 3rd feature is super handy for things like – bringing outside Dante elements to an installed house system that might live in static, or be locked down from IT). I used it for the last 2. Let’s discuss how I set it up to sample rate convert 48kHz assets for use in a 96kHz world and then bridge the two together.
First of all, you have to get your head right and partition your brain to accept that there are two separate worlds. One being 48kHz and the other being 96kHz. They don’t interact in anyway other than being able to pass audio from one world to the other. What does that mean? It means that they are going to operate as two completely independent networks whose only bridged touchpoint is going to be the PY64-D card inserted in the PY card slot of the DM7. This means you wont have HA control of a RIO or RX/Telemetry from a Shure receiver on the 48k network from the DM7 while at 96k. You are also not going to be able to see 48k assets in the 96k network, nor 96k assets in the 48k network in Dante Controller. In order to see both independent networks in Dante Controller, you are going to have to have two computers with each attached to one of the two networks. Then how do you patch? We’ll get to that in a moment, but first…
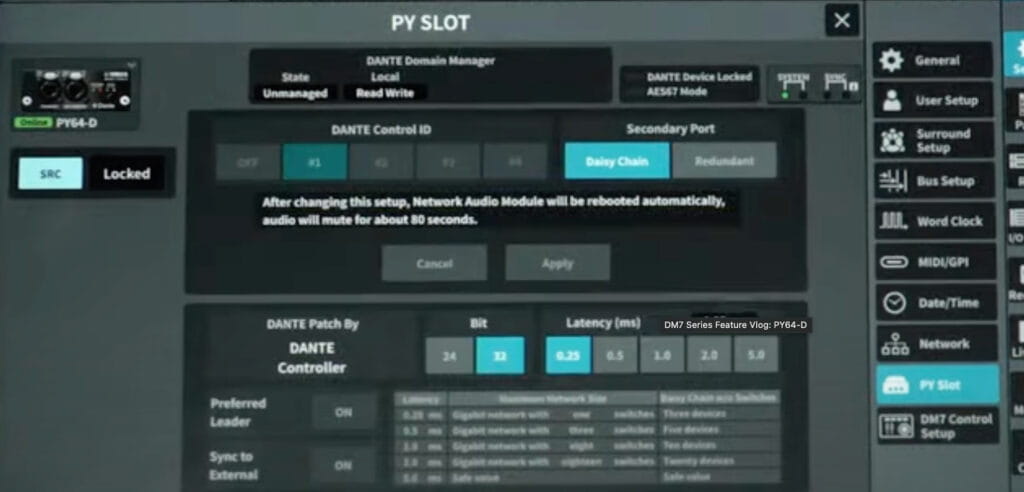
Yamaha DM7 PY Slot setup screen, showing PY64-D Card
Let’s look at the setup screen on the DM7. Navigate to the PY Slot. You’ll see your PY64-D card identified in the upper left hand corner. Hit SRC in order to enable it. The photo I took on site didn’t turn out to well, so I stole this screen grab from one of Andy’s great video tutorials so disregard the scene name & ‘daisy-chain’ setting (gross).
So, thus far we’ve isolated two independent networks. And now we’ve set up our PY64-D card from the DM7. Now, we need to patch! But how do we patch your 48kHz assets if you cant see the devices in the 96kHz network on Dante controller or the console? Im glad you asked!
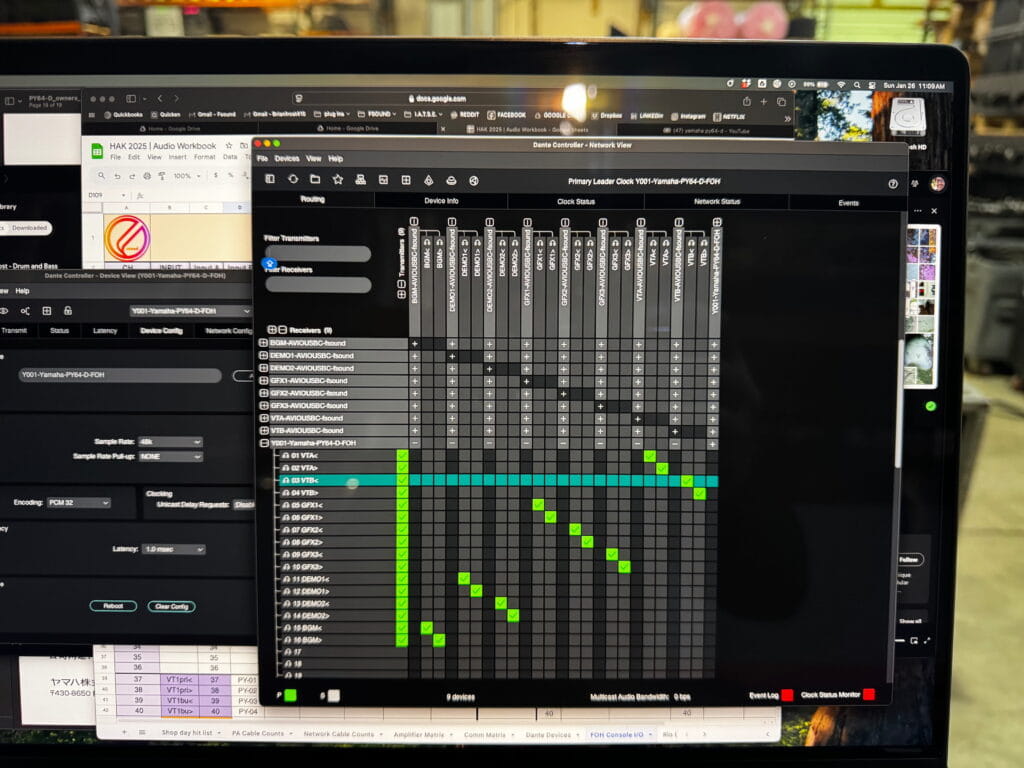
48kHz network in Dante Controller
First you have to patch all your 48kHz assets to the PY64-D card. Next, go back to the console to patch. I apologize, I did not snap a photo of the screen I wanted to share. However, just imagine patching from the channel view (or list, or grid view) and instead of selecting a Dante stream, or Omni port as the input source – you are going to select PY Slot numbers. If we use the above photo as a reference, you would patch PY Slot #1 for VTA Left, and PY Slot #2 for VTA Right. Just like the CL where you would patch slot 1-1, 1-2, etc. At this point, you should be able to see audio from your 48k sources patched to the PY card. Again, you wont have HA or any control for these audio streams, so you’ll have to use digital trim for gain control.
That’s it. We did it. We made the K’s into 96. Good job team. Signing off from a frigid ballroom in Vegas. Tata.
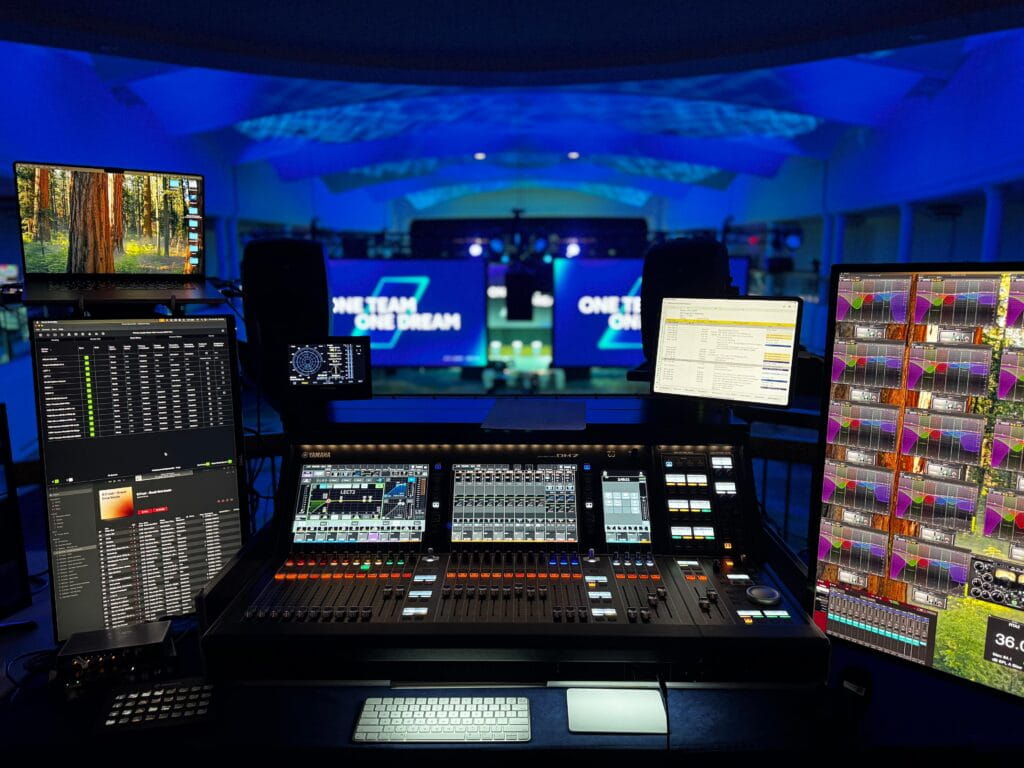
My FOH setup in the balcony
~ Brian Frost