Normalize audio in your QLab stack with one click
Posted on February 14, 2025

I have to give 100% credit for this trick to John Landsman at Directions Media. We had gotten into a discussion of cool things we like to do in Qlab. Turns out we are pretty darn close with our workflow, including opting to use the panic button (w a 3 second fade) to stop cues, rather than build a fade cue for Every . Single . Cue . I’ll quote him even, “Hitting go again to stop a cue just feels weird.” I agree buddy, I agree. Yes we realize that if you are playing a walk in playlist down different pipes on the same machine that this wouldn’t work. But for the vast majority of the time, this works just fine for our given workflow.
Now, I say I give 100% credit to John, because I learned it from him. But of course he learned it from someone else too. The longer you are in this audio game, the more you realize that’s how it works. You steal good ideas along the way that work for yourself (and maybe add in a tweak here and there) and then share it to someone else. It’s the circle of audio ;).
Level Playing Field from the QLab Cookbook Is where John found Mic Pool’s original article. If you click and visit the link, you can read all about it and how it works in great detail, so I wont regurgitate that here. But basically, there is a Script (code) called r128x authored by someone named Audionuma and released under a GNU General Public License that analyzes the entire waveform for selected tracks, and then gain balances them based on the LUFS broadcast standard. LUFS (Loudness Units Full Scale) is a standardized measurement of loudness used in audio production, broadcasting, and streaming to ensure consistent volume levels across different media. It is based on human perception of loudness rather than just peak or RMS levels. It’s also noteworthy that this version of the script became obsolete as Mac OS was updated. ShikiSuen then compiled it and made it work for the current OS, and now it’s called r128x-cli. Blah blah blah….
The Level Playing Field link also outlines how to install and implement it. I found it a little difficult to follow, and after some frustration fumbled into how to get it to work on Mac’s current OS. Aaaand of course with some of John’s advice, how to tweak it for optimal performance. Once you set this up, forever more it will be a simple ‘highlight cues you want to normalize, and then keyboard-shortcut’. I didn’t believe him I at first. I was like, SHUT UP. Do you know how many HOURS of my life I have spent auditioning audio media in Qlab in an effort to get them to be at the same level? I believe the total amount can be quantified in days, if not a week + at this point in my career. He was like, “I know, I had to change my shorts after I got it to work.” I’m going to show you how to set this up, so have a clean pair of underwear on standby.
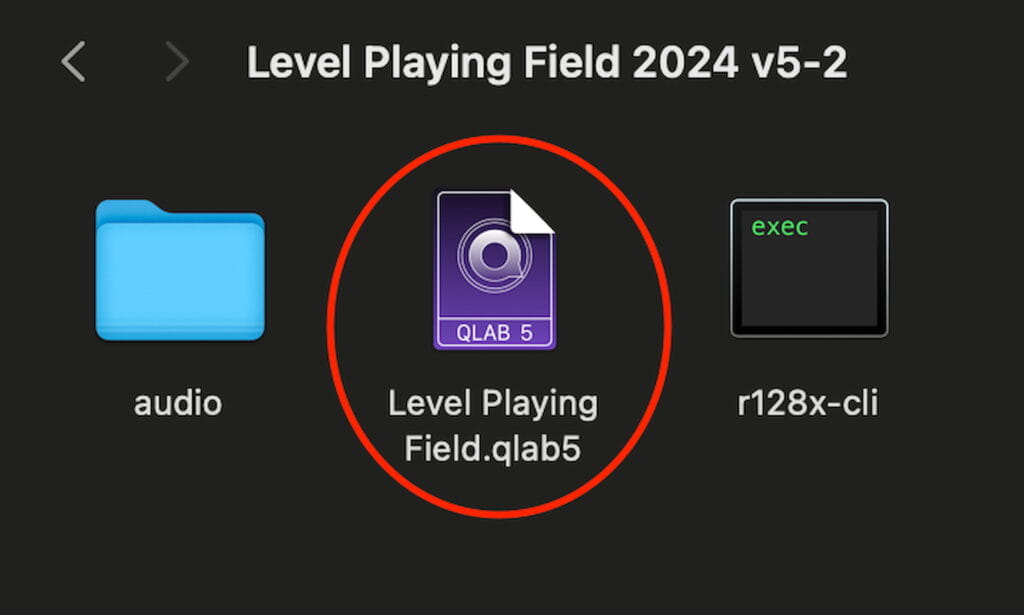
First, download the script file (circle in red below) from Level Playing Field
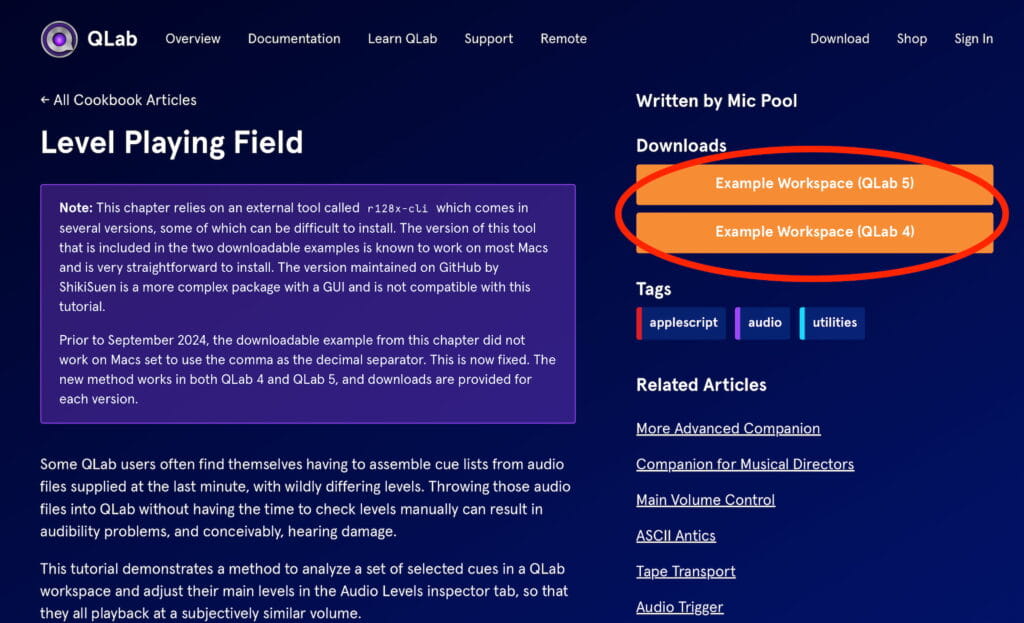
Choose the correct script for your version #
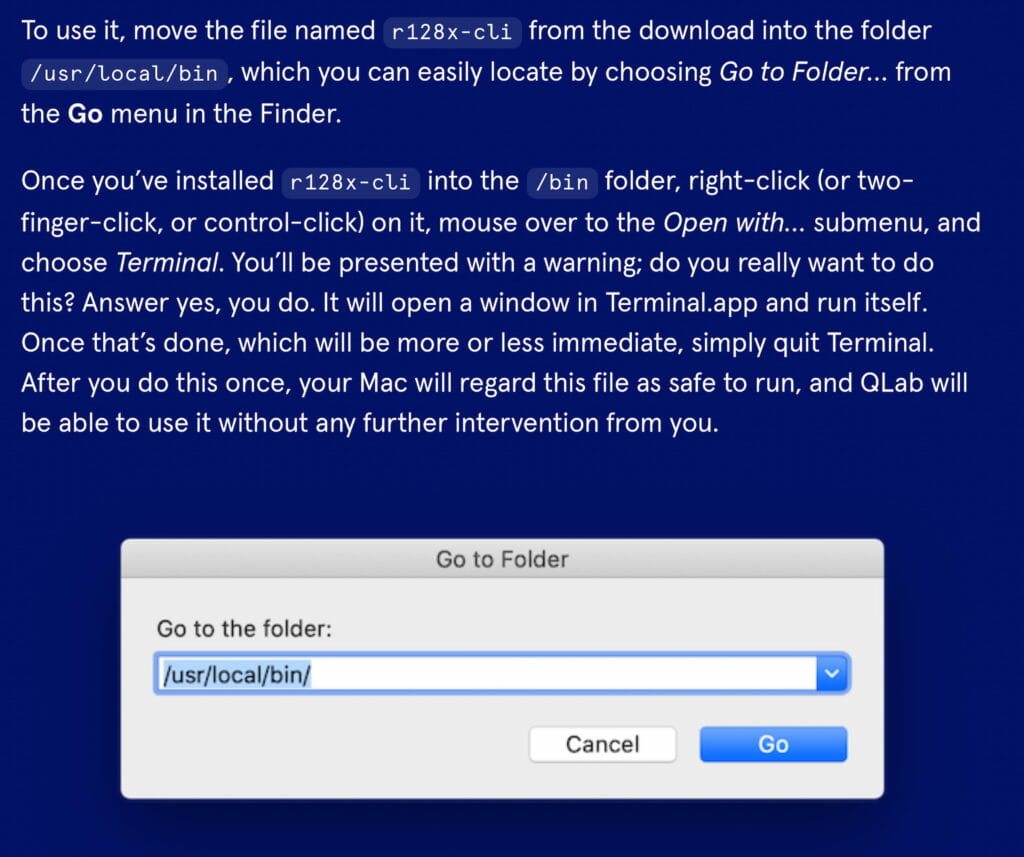
Next, follow their instructions —>
Now, I tried to do this, but a warning dialog box popped up for me.
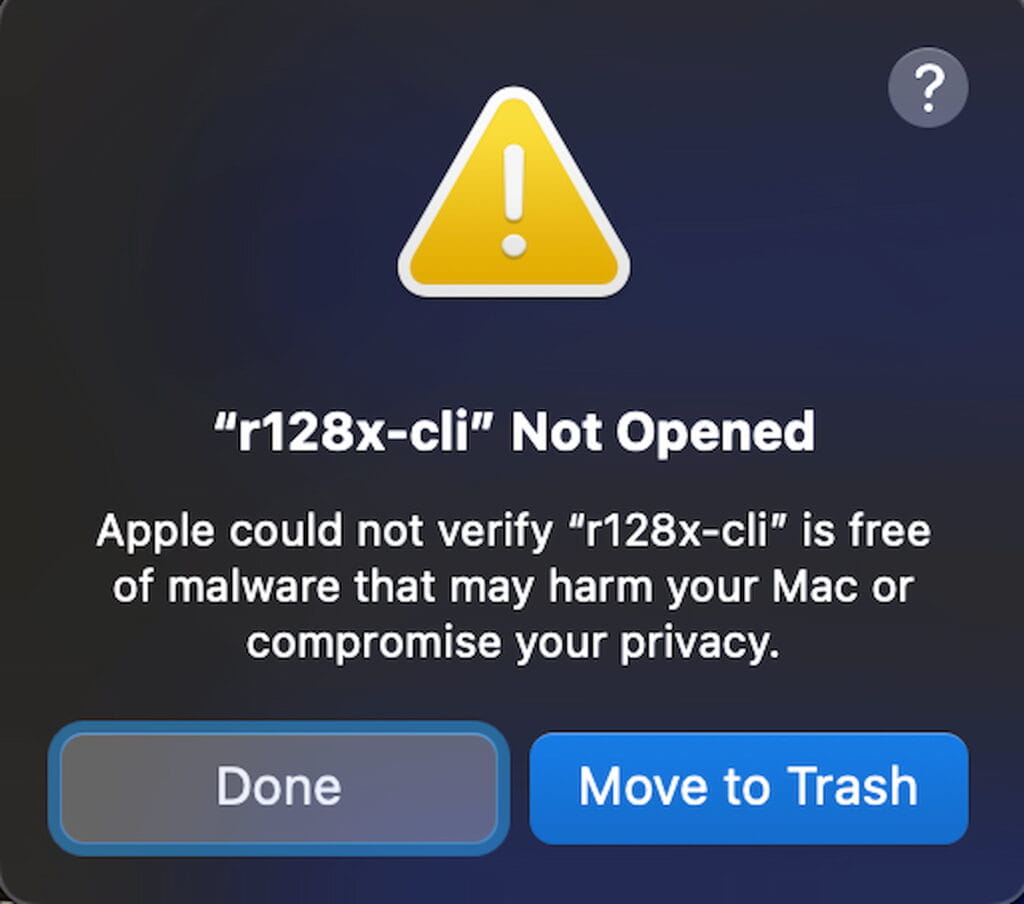
Bummer! But I didn’t give up, I know the new Mac OS is very guarded about installing or running 3rd party apps. I tried the Ctrl + Click, but that didn’t work. So I went into my Privacy settings and voilá!
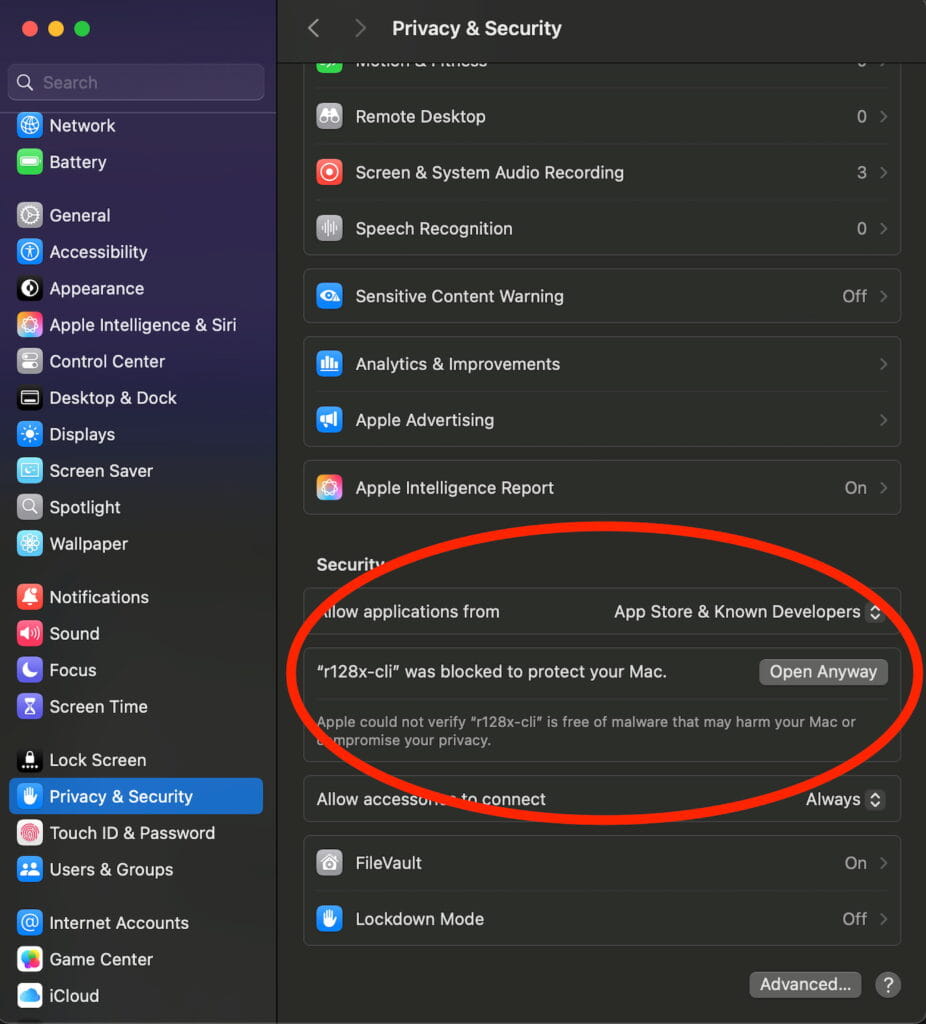
I know you mean well Apple, but sheesh. Ok, so Open Anyway! As described in Level Playing fields instructions above, it should run immediately in Terminal. Then that’s it, you’re done with Terminal. Close it.
Next, go back to your downloads folder and open up the qlab file in the folder from the Level Playing field download.
Next, highlight this cue (This is the script) and copy it (command + c).

Now Open up a new workspace (this is a screen grab of my non-broadcast start template below). Create a new list (circled in red). Ive named my new cue list “Scripts”. Now paste your previously copied script in this new cue list.
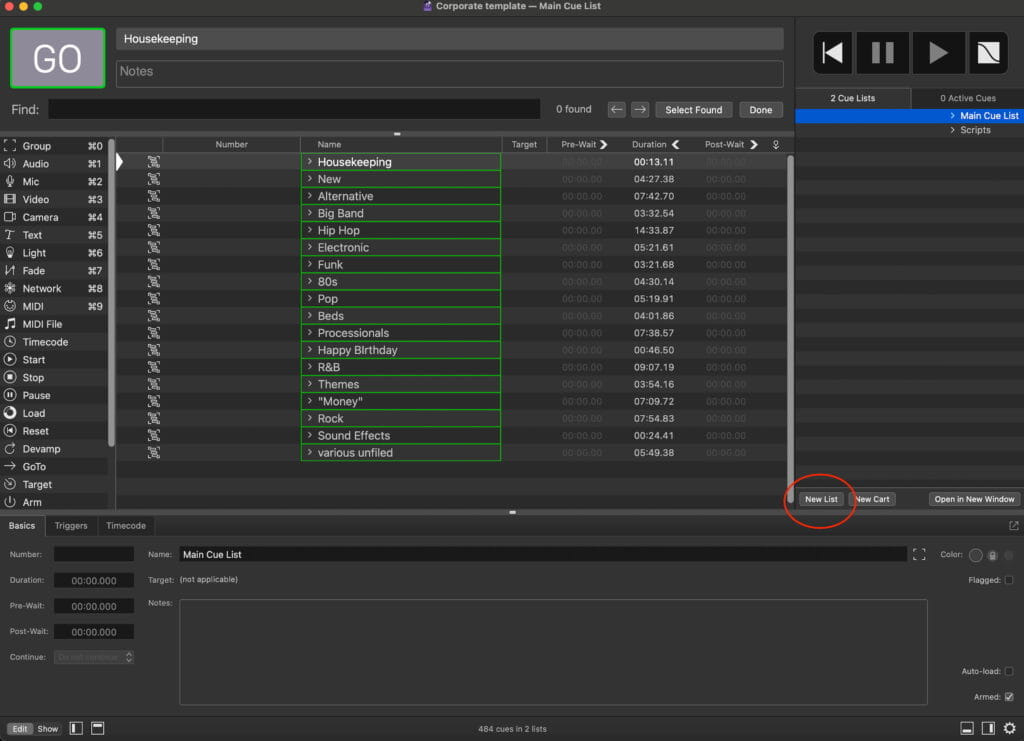
I’m gonna go on a little side quest real quick before we move on. If you don’t have an existing start template that you use every show, I would highly suggest to start doing so. Personally, I have two different starting templates in Qlab. One for non-broadcast shows with groups of cues by type. Like, VO’s – housekeeping & emergency. Play On’s – Alternative, Electronic, Hip Hop, etc. And another template for broadcast shows. This one is totally blank, except for routing / ganging / patching rules (& now this script). Why not just make a group of royalty free music I’ve acquired from past shows and have one template you ask? I don’t keep royalty free music for future use. Reason being, if I don’t have an in-perpetuity all-use blanket publishing certificate for media, I delete it after the show where it was given to me. I am not going to compromise a future clients show being taken down off the web because I used music acquired from a previous show that I cannot personally vet. It’s a CYA thing. That’s Cover Your Ass, for those not familiar ;). The other reason you should make a start template is – it saves you from having to copy/poste this new LUFS script for every new workspace. Because the script won’t work unless it’s somewhere in the current workspace where you wish to normalize audio.
So, the script should work at this point. Let’s go ahead and try it. Highlight a few audio cue’s in your existing workspace, or import a few to give it a try. FYI, you can select multiple cues by holding down the shift key as you select.
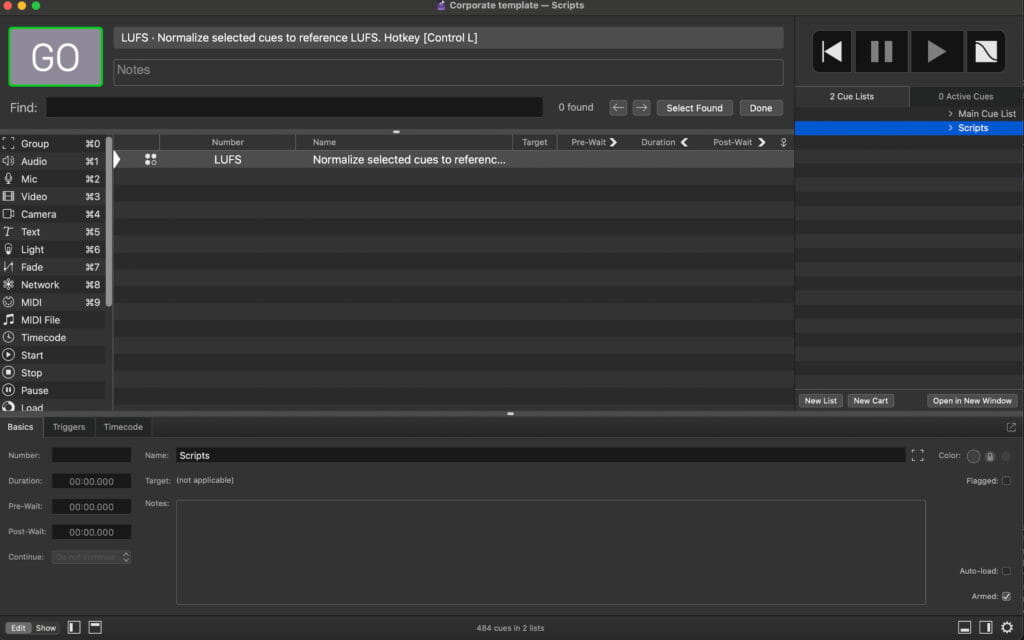
By default, the script’s shortcut to start the leveling process is Ctrl + L (circled in red below). You can change it to whatever you like, but I left mine as is.
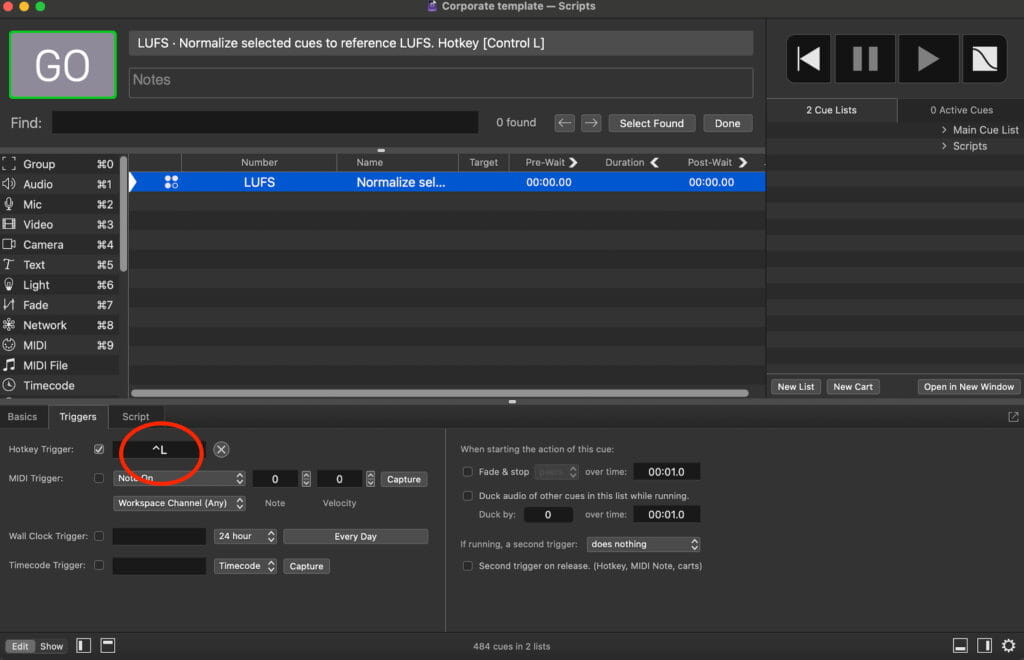
Hit Ctr + L for your highlighted cues.
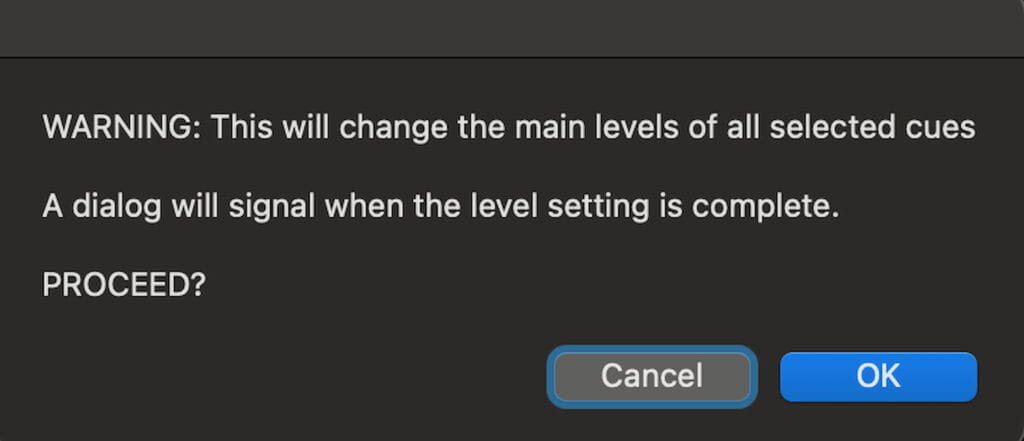
You’ll see this dialog box pop up, hit OK.
Depending on how many cues, your mac’s processor ability, and the media length, the below box will show once the script is done leveling your tracks. Shouldn’t be more than 6 seconds for a handful of cues.
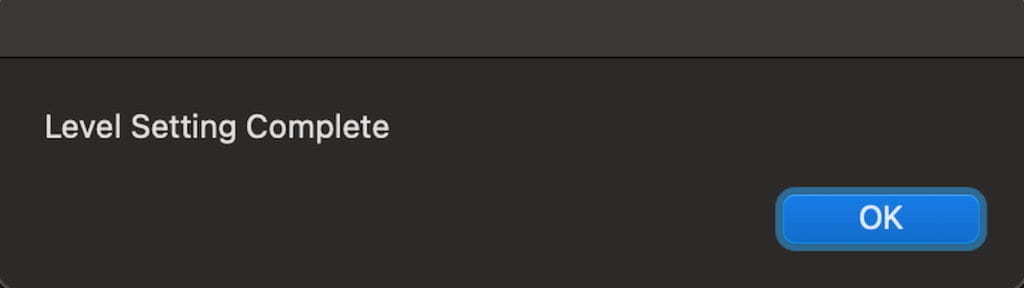
Hit OK.
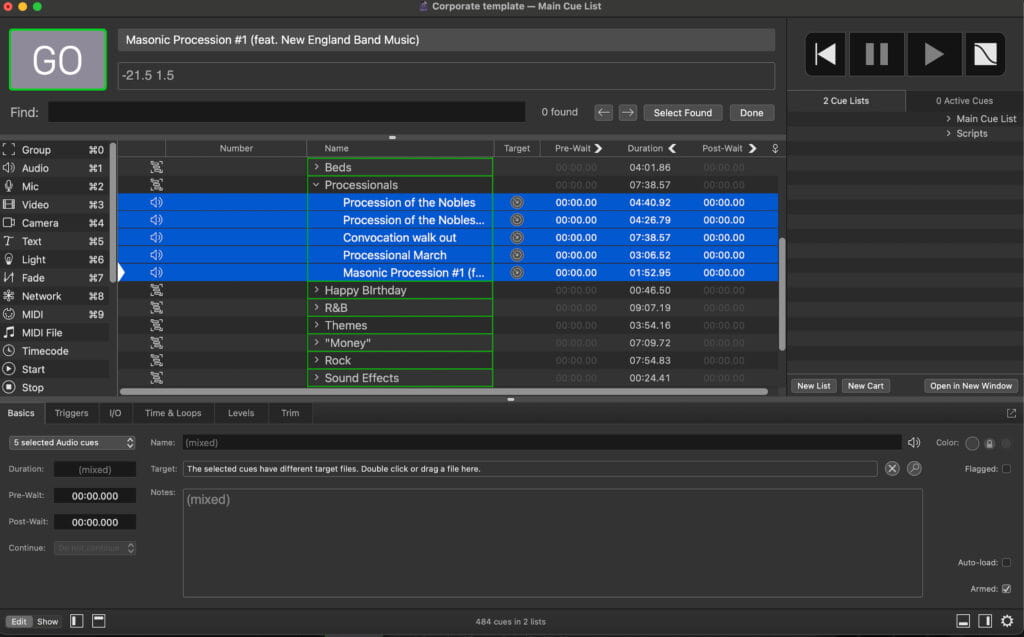
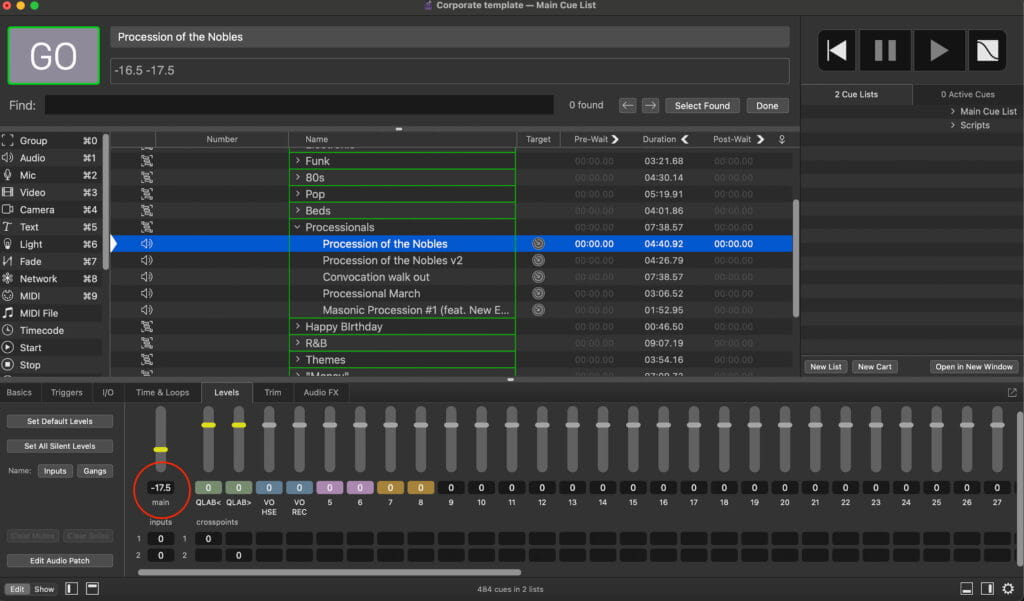
If you highlight the cues you leveled, and look into the levels tab you will now see a (mix) of volumes for the selected media. In fact, if you are in this window as you are running the script, you can see it working in real time.
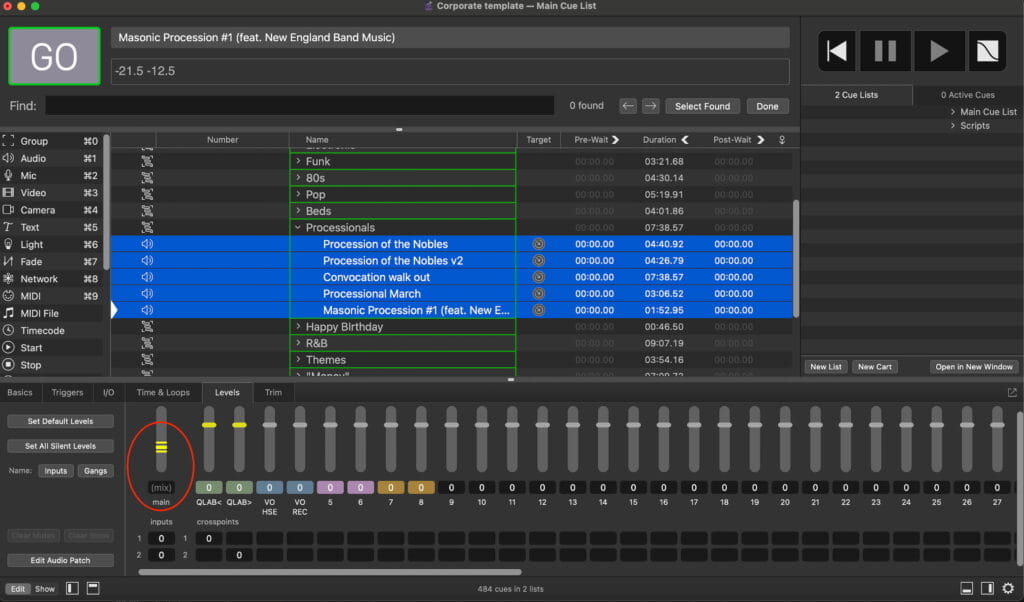
That’s it, you are Leveled to the tenth of a decibel my friends. Good job.
Now comes the tweak (Thanks again John). If you’re like me, and you scroll down the list of leveled tracks, most of them have been attenuated to somewhere around -20 or so. While yes, all the tracks should now play at -24LUFS if you play at line level to your console I would prefer to attenuate the digital trim down on the console and have the software (Qlab) play at a volume closer to zero. So let’s fix this.
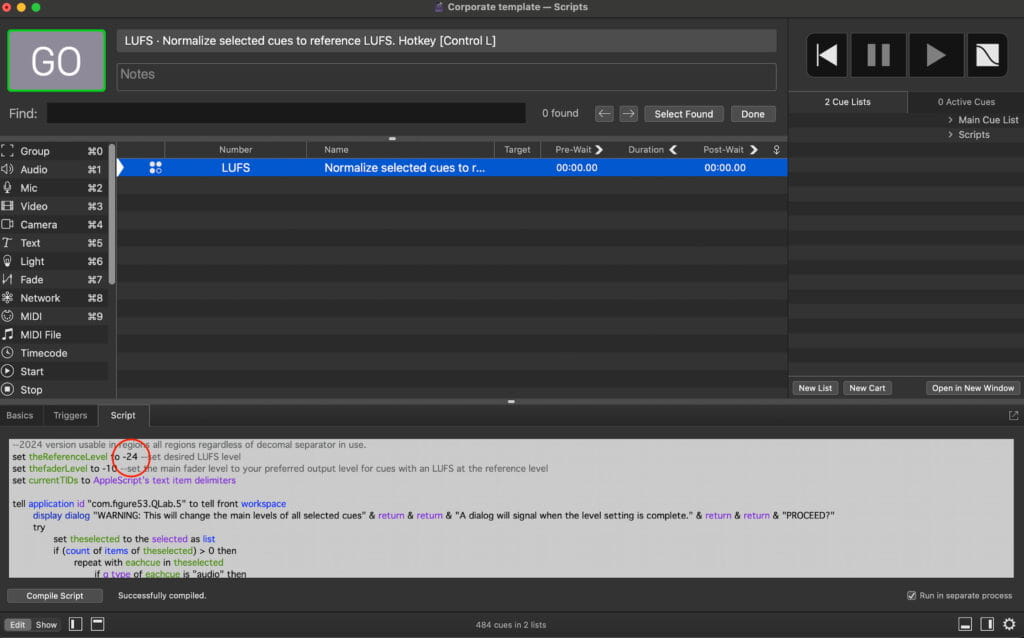
Go back to your LUFS script, highlight it, and then navigate to the script tab. You are now looking at the actual code used to level your tracks. We are going to change the reference level from -24 to -10. So highlight JUST the 24 and replace it with 10. Dont hit enter, or space. We just want to replace the -24 with -10. That’s it. Done. Now go back to your cues you previously leveled and re-run the script by highlighting the same cues and hit Ctrl + L.
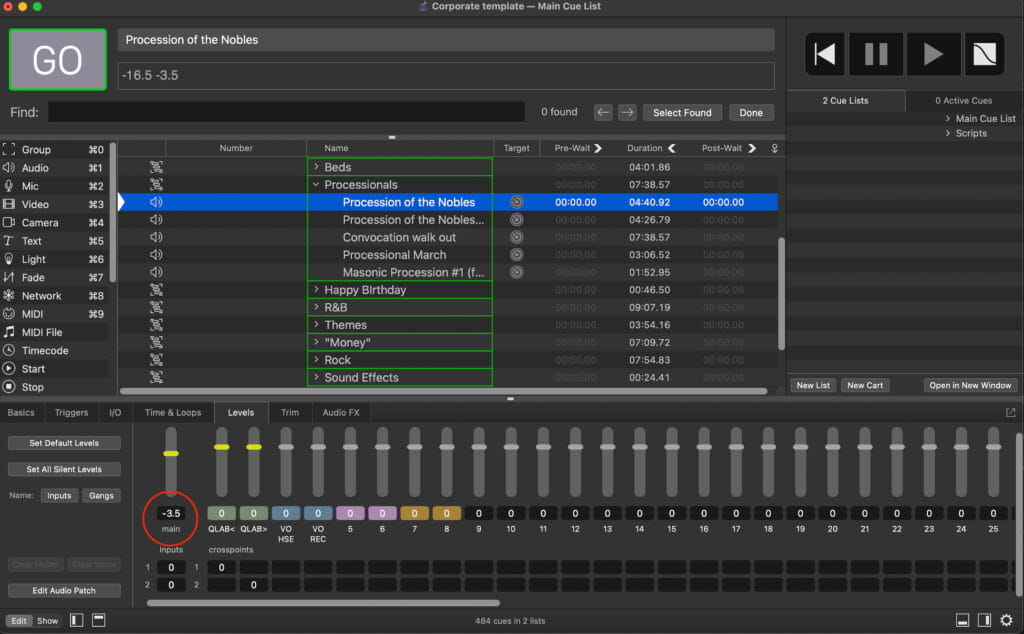
This same cue that was -17.5 after running the script previously is now -3.5. You can adjust this as needed in the script moving forward if cues you are getting are either consistently super quiet or loud, but we find -10 is a decent level to leave the script at.
That’s it. You’re done. Save this script in Qlab for future use. We just gave you back hours, if not days of your life. If you choose to hold it close to the chest and tell your show caller you still need that hour to normalize while you relax – it’ll be our little secret 😉 Also, you are quite welcome! So thank you Mic Pool. And next time you see John Landsman on show site, please buy him a cookie after work.
~ Brian Frost